IncrementX – Google Ad Manager Integration Guide
Step 1 – Ad Unit Creation (Go to Inventory -> Ad Units -> New Ad unit)
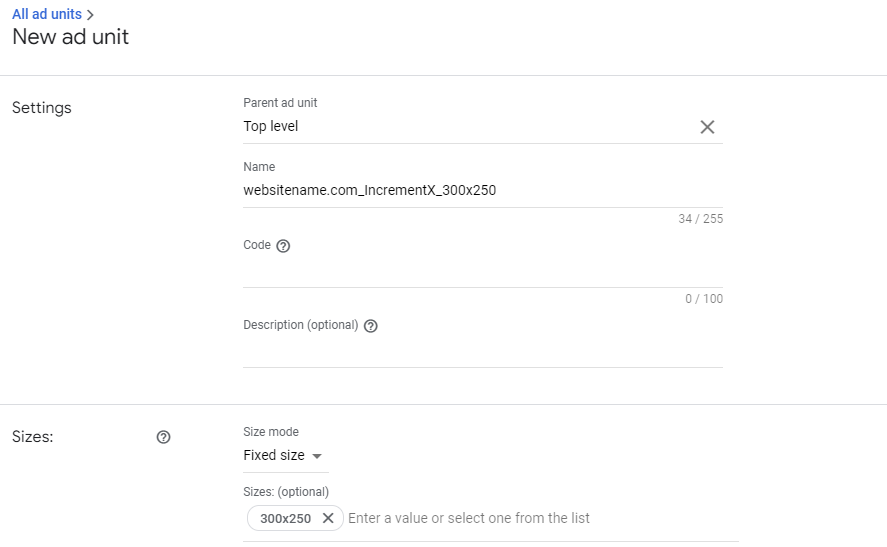
In the Settings section
- Parent Ad unit should be “Top Level”
- Name will be the Ad Unit name which can be easily identified (Eg: websitename.com_IncrementX_300x250)
- Code is used to identify the ad unit in the associated ad tag and cannot be changed once saved
In the Sizes section
- Select the size of the ad unit from the drop-down menu (Size). You can select more than one size (for example, 300×250, 728×90, and 300×600)
- From the Target window drop-down menu and choose one of the options i.e. Top or Blank. If you select Top, the landing page associated with the ad will be opened in the current tab when a visitor clicks the ad. If you want to open the landing page in a new tab, then select Blank
Click, Save Like this you can create multiple Ad Units
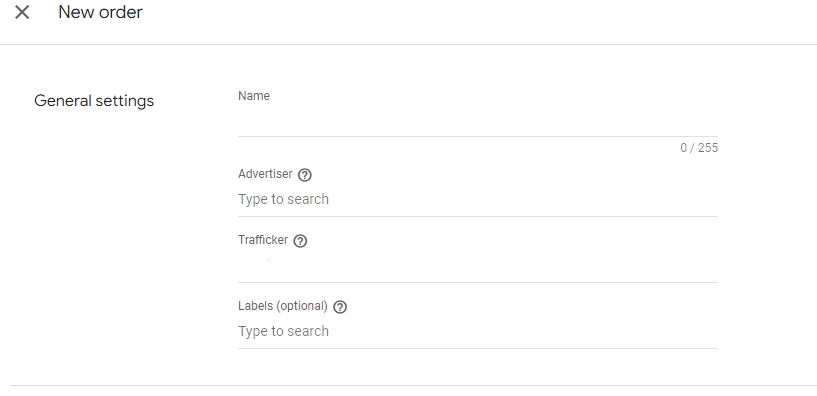
Step 2 – Create New Order (Go to Delivery -> Orders -> New Order)
- Give order a Name Eg: IncrementX Order
- Advertiser/Company create a New Company, Select a type and Give it a Name
- Fill your email address in the Trafficker space.
After filling this skip the optional spaces and click to Add Line Item
(make sure you approve this order)
Step 3 – Create Line Item
- Click Order which you just created and click New Line Item
- Select Line Item Type (Display / Video or Audio), in this Example we have selected Display
- Select Line Item Type as Network, with no impression goals. It is suggested to use Network priority when you want to display several line items evenly
- Select expected creatives (for example, 300×250, 728×90, and 300×600)
- In Delivery Settings, keep start time “Immediately”, end time “Unlimited” and impression goal as 100%
- In Adjust Delivery, keep display creative “As many as possible” and rotate creative as “Evenly”
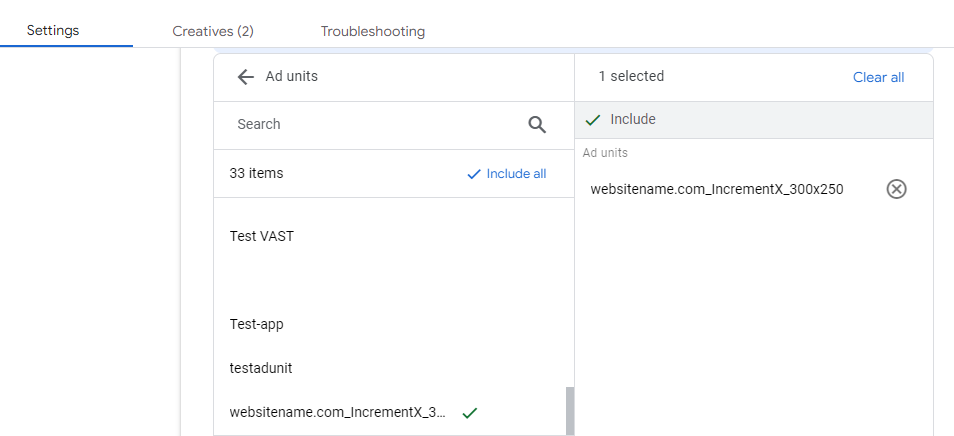
- In the Ad Targeting, Expand the Inventory Section expand the Ad unit and search for the ad unit which you have created in the Step 1 and move to included list
- In the Ad Targeting, Expand the Geography Section by default all countries will be included. Based on the requirement you can include or exclude the country based on this line item will qualify
Click save, and Activate/Resume the Line Item
Step 4 – Adding Creatives
- Click Line Item which you just created It will ask to add creative to this line items
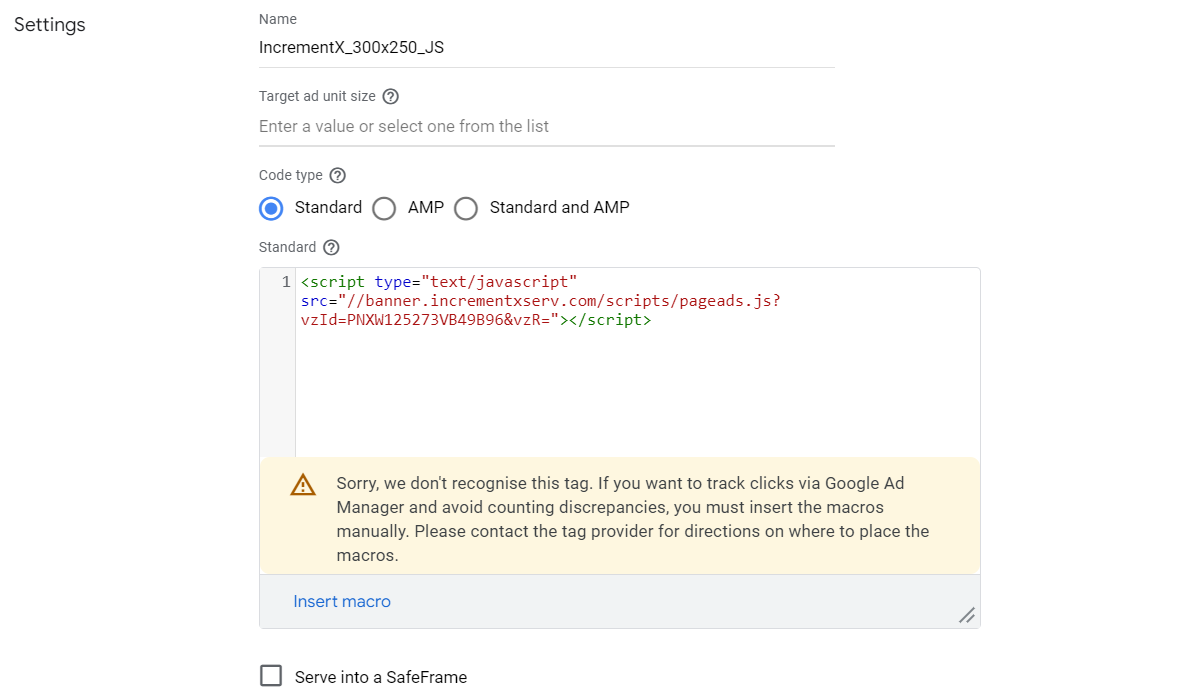
- Click, Add Creative, New creative and select the size eg: 300×250
- Select, Third party option where IncrementX Tags can be added
- Give creative a name (Eg: IncrementX_300x250_JS)
- Select code type as Standard and Paste the 300×250 Tag which you received from IncrementX Adops Team
- Uncheck, Serve into a SafeFrame
Click, Save Like this you can Add other sizes creatives
Step 4 – Generating GAM Tags
- Go to, Inventory -> Ad units
- Search for the ad unit which you have created in the Step 1 and open it
- Go to Tags Tab, Select type as “Google Publisher Tag” and click Continue
- Keep only single request enabled and click Continue
- Now, it will generate 2 tags as mentioned below (Head and Body Tag)
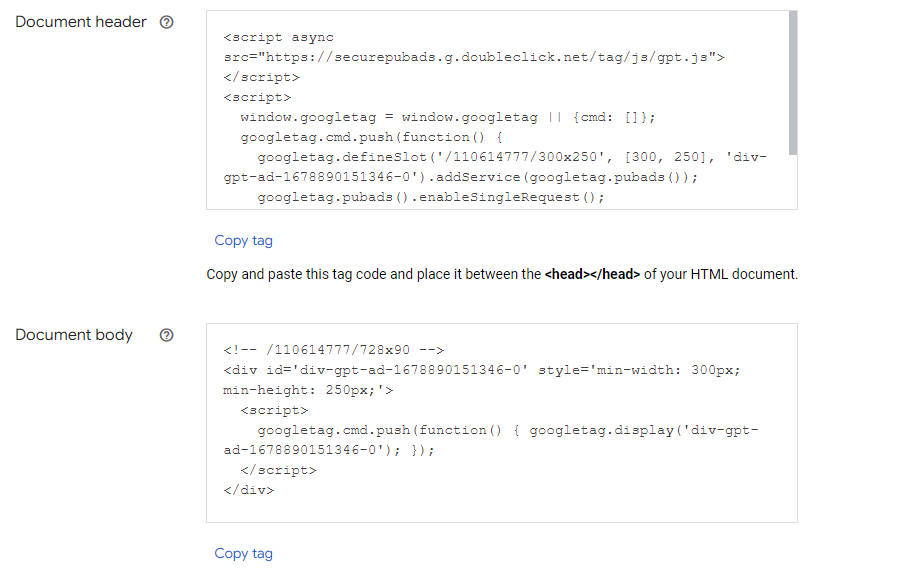
- Copy the generated tag (in the Document header) for the header and paste it to the header code of your website
- Copy the tags generated (in the Document body) and paste them below <body> tag in your website’s source code.
That’s All, the ad server is ready to serve ads on your website